
I’ve signed up! How do I get started with My LearningCart site setup?
LearningCart is designed to be simple to set up. You may want to use the steps below as a guide to getting your site configured.
Site Settings
Update/configure your Site Settings including setting up your Payment Gateway.
For more information review the online help here
Logo & Branding
Create and update the site to include your logo and branding colors.
To update your site colors, on the Site Content/Manage Page Templates page, click the Customize Template link for the default template.
Enter the code for each parameter or click on the field to select the color on the popup selector
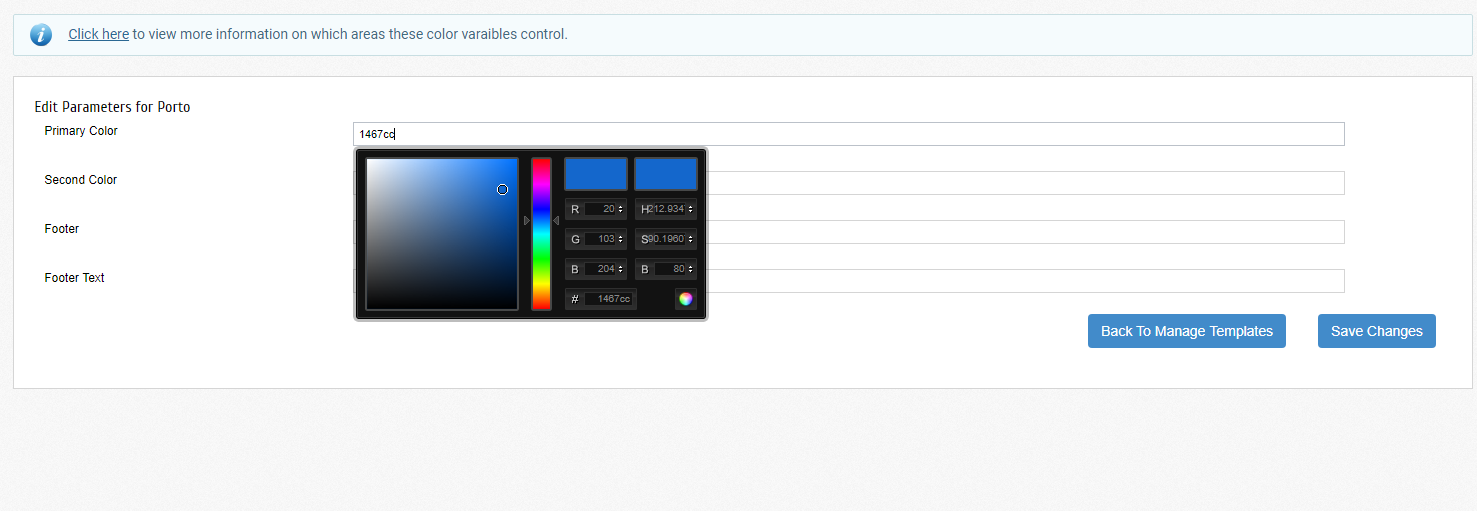
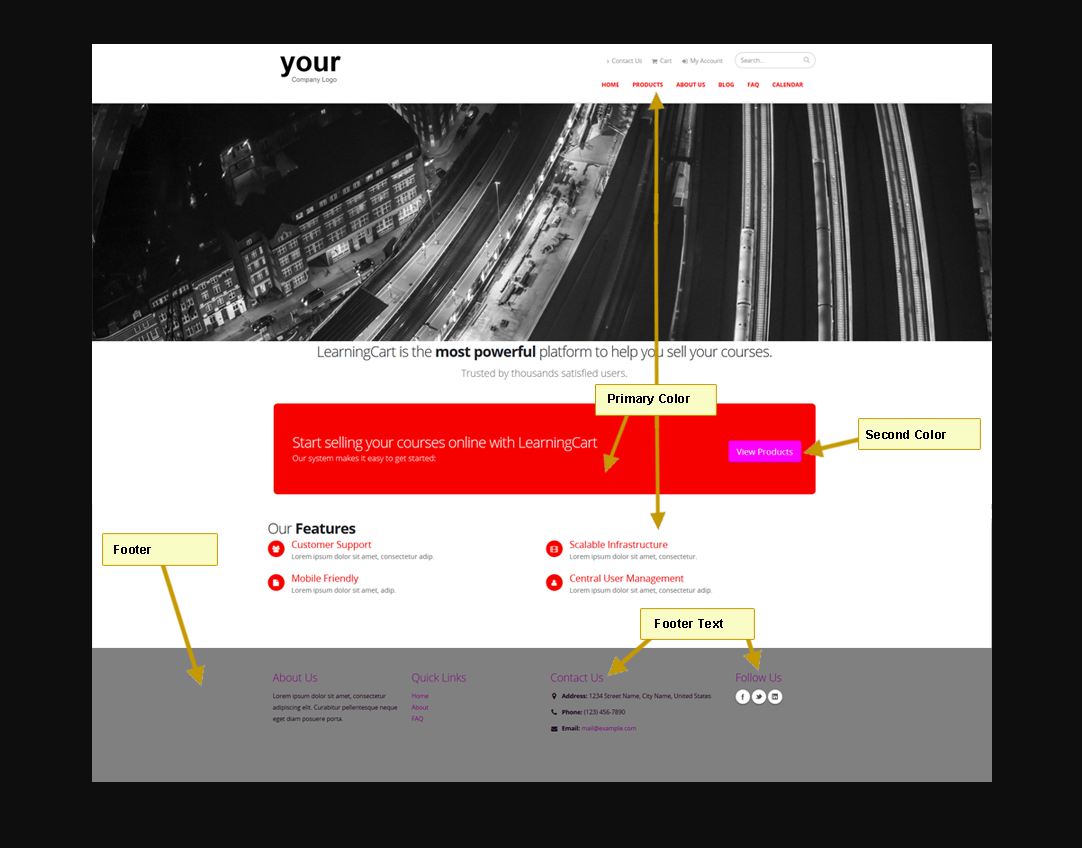
To reference what parameters control the various areas on your site, click the help link at the top of the page for a popup.
For information on updating your logo, see this KB article.
Site Content
Create & update your site content pages such as the Home, About Us, Term & Conditions page etc.
View the online help here for more information on adding & editing site content pages.
Categories
LearningCart allows you to categorize products using Categories and Subcategories.
Categories & subcategories can be used to set up product catalog pages, creating discounts and for routing order confirmation email notifications to team members.
Add the categories and subcategories desired for your site. To add a catalog page that displays products associated with a specific subcategory, view the online help here
Courses, Learning Content & Products
LearningCart’s updated Admin interface allows you to easily add Courses, Learning Content & Products in a single step.
For information on adding Courses (and associated Learning Content & Products) – view the online help here
Certificates
Custom certificates of completion can easily be created with LearningCart. For more information - view the KB article here
Forms, Calendar and Blog posts
You may want to capture additional fields on the user profile form to track data specific to your organization. You can add fields to the User Profile form as needed. These fields can also be printed on Certificates of Completion. For more information on updating the user profile form - see the online help here.
A calendar of events can also be added to your site.
If you don't already have a Calendar page you can set one up by going to the /Site Content/Add content page
Select the Link option and click Go
Select the node you want the page to be created under
On the Add Content page, click the browse link for the URL field
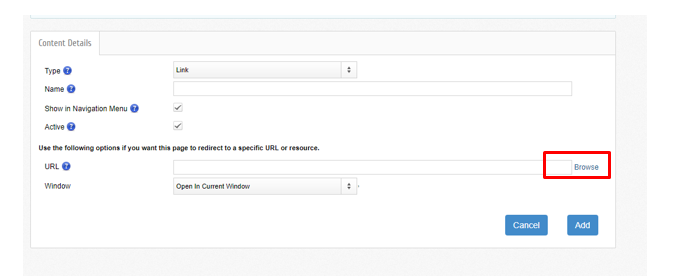
Select item type of System Page and select the Calendar
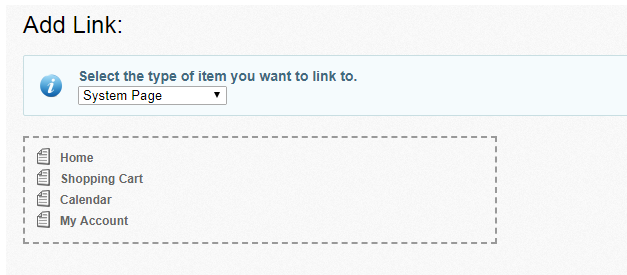
Click the Add button to save your changes and add the Calendar page.
You can then add events to your calendar. For more information on adding calendar events, check the KB article here
To add a blog to your site, you'll need to first create the Blog and then add your posts.
For more information on adding a blog see the online help here
Site Settings
Update/configure your Site Settings including setting up your Payment Gateway.
For more information review the online help here
Logo & Branding
Create and update the site to include your logo and branding colors.
To update your site colors, on the Site Content/Manage Page Templates page, click the Customize Template link for the default template.
Enter the code for each parameter or click on the field to select the color on the popup selector
To reference what parameters control the various areas on your site, click the help link at the top of the page for a popup.
For information on updating your logo, see this KB article.
Site Content
Create & update your site content pages such as the Home, About Us, Term & Conditions page etc.
View the online help here for more information on adding & editing site content pages.
Categories
LearningCart allows you to categorize products using Categories and Subcategories.
Categories & subcategories can be used to set up product catalog pages, creating discounts and for routing order confirmation email notifications to team members.
Add the categories and subcategories desired for your site. To add a catalog page that displays products associated with a specific subcategory, view the online help here
Courses, Learning Content & Products
LearningCart’s updated Admin interface allows you to easily add Courses, Learning Content & Products in a single step.
For information on adding Courses (and associated Learning Content & Products) – view the online help here
Certificates
Custom certificates of completion can easily be created with LearningCart. For more information - view the KB article here
Forms, Calendar and Blog posts
You may want to capture additional fields on the user profile form to track data specific to your organization. You can add fields to the User Profile form as needed. These fields can also be printed on Certificates of Completion. For more information on updating the user profile form - see the online help here.
A calendar of events can also be added to your site.
If you don't already have a Calendar page you can set one up by going to the /Site Content/Add content page
Select the Link option and click Go
Select the node you want the page to be created under
On the Add Content page, click the browse link for the URL field
Select item type of System Page and select the Calendar
Click the Add button to save your changes and add the Calendar page.
You can then add events to your calendar. For more information on adding calendar events, check the KB article here
To add a blog to your site, you'll need to first create the Blog and then add your posts.
For more information on adding a blog see the online help here
 Get help for this page
